Nissan Sentra B18 (2020-2025) Owner's Manual: Rear-facing child restraint installation using LATCH
Do not use the LATCH lower anchors if the combined weight of the child and the child restraint exceeds 65 lbs (29.5 kg). If the combined weight is greater than 65 lbs (29.5 kg), install the child restraint using the vehicle’s seat belt instead of the lower anchors. Always follow the child restraint manufacturer’s installation instructions.
Follow these steps to install a rear-facing child restraint using the LATCH system in the Nissan Sentra:
1. Position the child restraint on the seat.
Always follow the child restraint manufacturer’s instructions for correct placement and orientation.
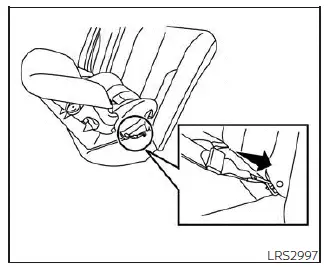
Rear-facing webbing-mounted - step 2
2. Secure the child restraint anchor attachments to the LATCH lower anchors.
Confirm that each LATCH attachment is fully engaged and properly connected to the lower anchors.
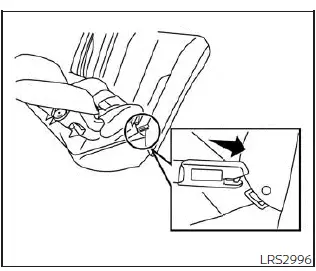
Rear-facing rigid-mounted - step 2
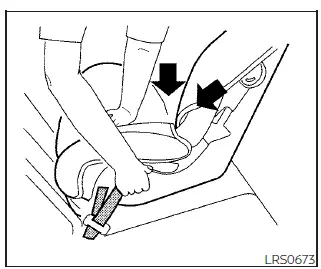
Rear-facing - step 3
3. For child restraints equipped with webbing-mounted attachments, remove any excess slack from the anchor straps. Press firmly downward and rearward at the center of the child restraint to compress the vehicle seat cushion and seatback while tightening the webbing attachments.
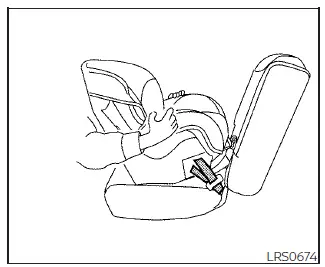
Rear-facing - step 4
4. After securing the child restraint, test the installation before placing the child in the seat. Hold the child restraint near the LATCH attachment path and push it from side to side. The restraint should not move more than 1 inch (25 mm) side to side. Pull forward on the restraint to verify that the LATCH attachments hold it firmly in place.
If the child restraint is not secure, tighten the LATCH attachments as necessary, or reposition the restraint to another seating position and repeat the test. In some cases, installing the restraint using the vehicle seat belt may provide a better fit, as not all child restraints are compatible with all vehicles.
5. Before each use, check that the child restraint is securely installed. If the restraint is loose, repeat steps 1 through 4 to ensure proper installation.
Other materials:
Park/neutral Position Switch
Component Inspection
Component Inspection
CHECK PARK/NEUTRAL POSITION
SWITCH-1
Turn ignition switch ON.
Check the voltage between ECM harness
connector and ground.
...
Consult Checking System
Description
Description
Note:
This vehicle is diagnosed using the CONSULT-III
plus.
When CONSULT is connected with a data link connector equipped on the
Nissan Sentra vehicle side, it will
communicate with the control unit equipped in the vehicle and then
...
B2f73-23 Clutch Switch
Dtc Description
DTC Description
DTC DETECTION LOGIC
DTC No.
CONSULT screen items
(Trouble diagnosis
content)
DTC detecting condition
...