Nissan Sentra B18 (2020-2025) Service Manual: Headlining
Exploded View
Exploded View
STANDARD ROOF
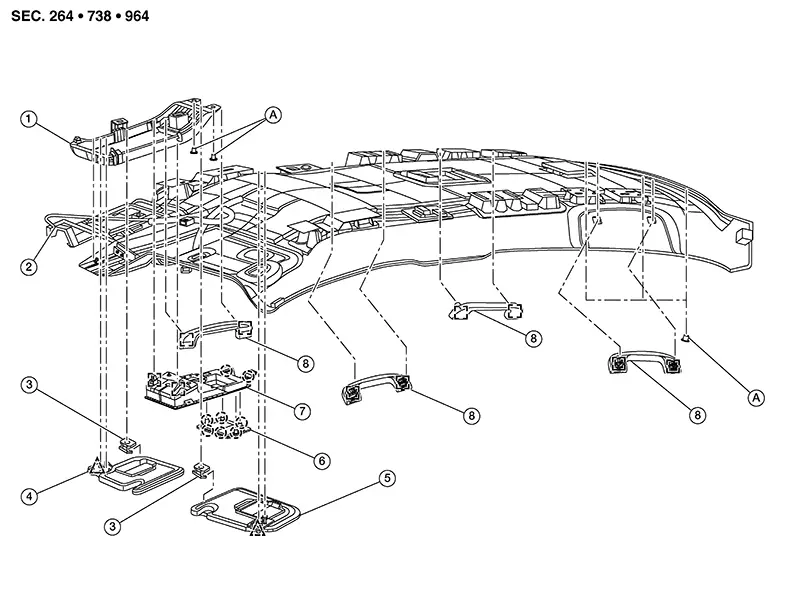
|
1. |
Front room/map lamp assembly bracket |
2. |
Headlining |
3. |
Sun visor holder |
|
4. |
Sun visor (RH) |
5. |
Sun visor (LH) |
6. |
Switch finisher |
|
7. |
Front room/map lamp assembly |
8. |
Assist grip |
A. |
Clip |
|
|
Clip |
|
Pawl |
|
Metal clip |

MOONROOF
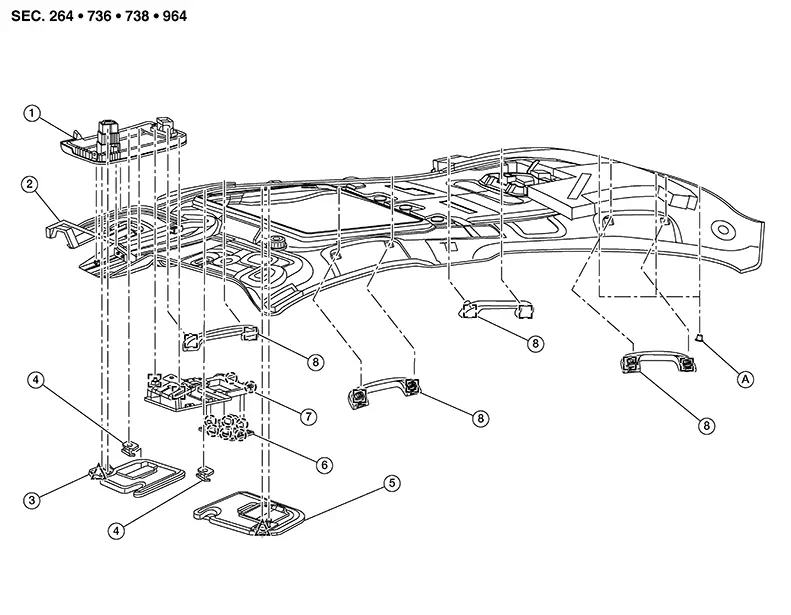
|
1. |
Map lamp bracket |
2. |
Headlining |
3. |
Sun visor (RH) |
|
4. |
Sun visor holder |
5. |
Sun visor (LH) |
6. |
Switch finisher |
|
7. |
Front room/map lamp assembly |
8. |
Assist grip |
A. |
Clip |
|
|
Clip |
|
Pawl |
|
Metal clip |
Removal and Installation
Removal and Installation
REMOVAL
Remove front pillar finishers (LH/RH). Refer to Removal and Installation.
Remove front seat assemblies. Refer to the following.
-
Removal and Installation - Seat Assembly (Driver Seat).
-
Removal and Installation - Seat Assembly (Passenger Seat).
Remove center pillar upper finishers (LH/RH). Refer to Removal and Installation.
Remove rear pillar finishers (LH/RH). Refer to Removal and Installation — Rear Pillar Upper Finisher.
Remove all assist grips.
Remove assist grip cap (3).
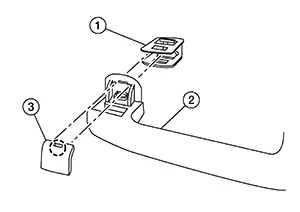
 : Pawl
Remove front room/map lamp assembly. Refer to Removal and Installation.
Using a suitable tool, release clip
and remove sun visors [1 (LH/RH)].
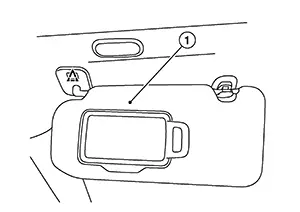
 : Clip
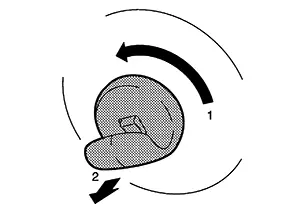
Remove sun visor holders (LH/RH).
Rotate 90° and remove as shown.
Using a suitable tool, remove headlining clips. Refer to Exploded View.
Disconnect harness connectors and
remove headlining from roof panel as shown. Adjust the position of
headlining so that it can be removed through rear driver side door.
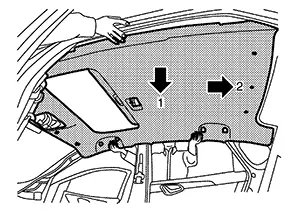
CAUTION:
Do not bend headlining when removing.
Note:
Headlining equipped with moonroof shown, standard headlining similar.
INSTALLATION
Installation is in the reverse order of removal.
CAUTION:
-
When installing headlining, start by installing both sun visor holders and the headlining clips in order to keep the headlining in position.
-
Do not bend headlining when installing.
-
Be careful that the surface is not wrinkled when installing.
-
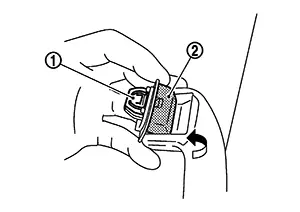
When installing assist grip, install metal clip (1) to assist grip clip (2), then install to the body panel.
Other materials:
Engine Coolant
Inspection
Inspection
Warning:
Do not remove the radiator cap or reservoir tank
cap when the engine is hot. Serious burns could occur from
high-pressure engine coolant escaping from the cooling
system.
When removing the ...
Precaution. Precautions
Precautions
Precaution for Supplemental Restraint System (srs) "air Bag" and "seat Belt Pre-Tensioner"
Precaution for Supplemental Restraint System (SRS) "AIR BAG" and "SEAT BELT PRE-TENSIONER"
The Supplemental Restraint System such as
“AIR BAG� and “SEAT BELT PRE-TENSIONER�,
u ...
Heated Seat Rh Relay
Component Function Check
Component Function
Check
CHECK HEATED SEAT RH RELAY FUNCTION
Check that seat cushion and seat back warm to the
preset temperature when operating the heated seat switch RH to HIGH
and LOW.
...