Nissan Sentra B18 (2020-2025) Service Manual: Defogger :: Removal and Installation
Filament. Inspection and Repair. Inspection and Repair
Inspection and Repair
INSPECTION
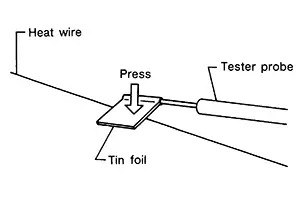
When
measuring voltage, wrap tin foil around the top of the negative
probe. Then press the foil against the wire with your
finger.
Attach
probe circuit tester (in Volt range) to middle portion of each
filament.
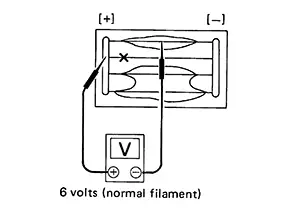
If a
filament is burned out, circuit tester registers 0 or battery
voltage.
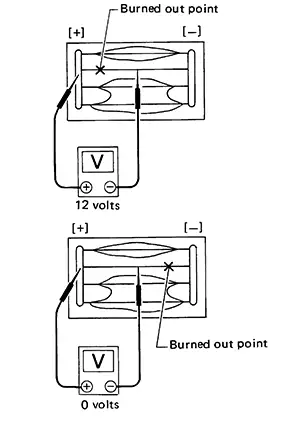
To locate burned out point, move probe to left and right along filament. Test needle will swing abruptly when probe passes the point.
REPAIR
REPAIR EQUIPMENT
-
Conductive silver composition (Dupont No. 4817 or equivalent)
-
Ruler 30 cm (11.8 in) long
-
Drawing pen
-
Heat gun
-
Alcohol
-
Cloth
REPAIRING PROCEDURE
Wipe broken
heat wire and its surrounding area clean with a cloth dampened in
alcohol.
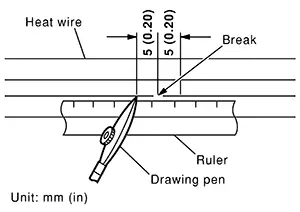
Apply a
small amount of conductive silver composition to tip of drawing
pen.
Note: 
Shake silver composition container before use.
Place ruler on glass along broken line. Deposit conductive silver composition on break with drawing pen. Slightly overlap existing heat wire on both sides [preferably 5 mm (0.20 in)] of the break.
After
repair has been completed, check repaired wire for continuity. This
check should be conducted 10 minutes after silver composition is
deposited.
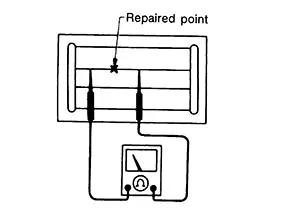
CAUTION:
Do not touch repaired area while test is being conducted.
Apply a
constant stream of hot air directly to the repaired area for
approximately 20 minutes with a heat gun. A minimum distance of 3
cm (1.2 in) should be kept between repaired area and hot air
outlet.
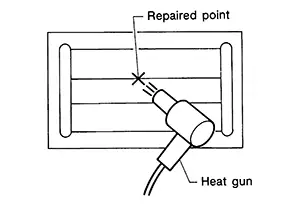 Note:
Note:
If a heat gun is not available, let the repaired area dry for 24 hours.
Condenser. Removal and Installation. Removal and Installation
Removal and Installation
REMOVAL
Remove the rear pillar finisher. Refer to Removal and Installation — Rear Pillar Upper Finisher.
Disconnect harness connectors (A).
Remove bolt
(B) and the condenser (1). 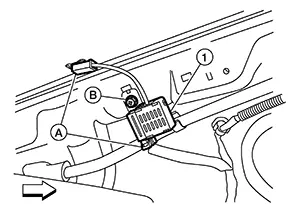
 :
Front
:
Front
INSTALLATION
-
Installation is in the reverse order of removal.
Note:Tighten to specification. bolt
: 8.0 N·m (0.82 kg-m, 6 ft-lb)
Other materials:
Trunk Opener Request Switch
Component Function Check
Component Function Check
CHECK FUNCTION
CONSULT
Select "Request switch BD/TR" in "Data Monitor"
mode of "BCM(TRUNK)".
Select that the functi ...
Tcm Branch Line Circuit (vehicle Can Communication 1 Circuit)
Diagnosis Procedure
Diagnosis Procedure
CHECK CONNECTOR
Turn the ignition switch OFF.
Disconnect the battery cable from the
negative terminal.
Check the following terminals and
...
Power Supply and Ground Circuit. Diagnosis Procedure
Diagnosis Procedure
Diagnosis Procedure
CHECK FUSE
Check that the following fuse is not blown:
Signal name
...