Nissan Sentra Service Manual: Glass lid
Exploded view
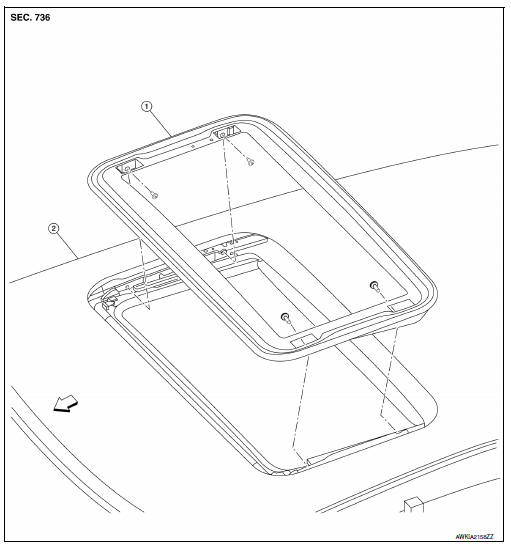
- Glass lid
- Roof panel
 Front
Front
Removal and installation
Removal
Caution:
- After installing glass lid, check gap/height adjustments and operation to make sure there is no malfunction.
- Handle glass lid with care to prevent damage.
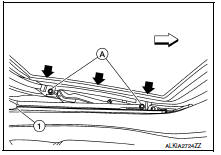
- Open sunshade (1), then close glass lid.
 Front
Front
- Remove glass lid bolts (a) on the lh and rh sides.
- Remove glass lid from moonroof unit assembly.
Installation
- Position glass lid to moonroof unit assembly.
- Tighten glass lid bolts.
Note:
First tighten the front bolt (lh), then the rear bolt (rh) on the moonroof lid assembly to prevent uneven torque while tightening the remaining the remaining bolts
- After installation, check moonroof operation and glass lid alignment. Refer to RF-40, "Adjustment".
Adjustment
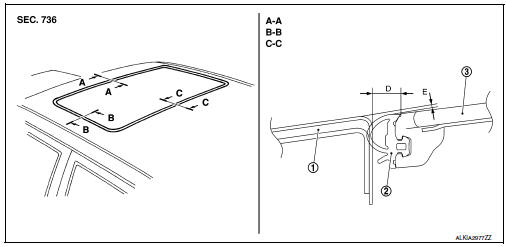
- Roof panel
- Weatherstrip
- Glass lid

- Loosen the glass lid bolts.
- Adjust the clearance of glass lid and roof panel according to the fitting standard dimension.
- First tighten the front bolt (LH), then the rear bolt (RH) on the moonroof lid assembly to prevent uneven torque while tightening the remaining the remaining bolts.
- Tilt glass lid up and down several times to check that it moves smoothly.
NOTE:
After adjusting the moonroof unit assembly, perform additional service. Refer to RF-18, "ADDITIONAL SERVICE WHEN REPLACING CONTROL UNIT : Special Repair Requirement".

 Moonroof motor assembly
Exploded view
Headlining
Sun visor
Moonroof motor assembly
Front
Removal and installation
REMOVAL
Close the glass lid.
Remove the map lamp. Refer to INL-52, "Removal and In ...
Other materials:
Washer nozzle & tube
Exploded view
Check valve
Washer tube
Washer tank
Washer pump
Washer nozzle
Clip
Washer nozzle
Washer nozzle : removal and installation
REMOVAL
Disconnect the washer nozzle from the hood by pushing on the
nozzle in the order and direction shown.
Disconnect the ...
Basic inspection
Diagnosis and repair workflow
Work flow
Overall sequence
Detailed flow
1.Get information for symptom
Get detailed information from the customer about the symptom (the condition
and the environment when the
incident/malfunction occurred).
>> Go to 2
2.Confirm the symptom
Try to ...
Front wiper arm
Exploded View
Wiper blade (RH)
Wiper arm (RH)
Wiper drive assembly
Wiper arm (LH)
Wiper blade (LH)
Removal and Installation
REMOVAL
Remove the wiper arm cap.
Remove the wiper arm nut.
Raise the wiper arm, then remove the wiper arm.
INSTALLATION
Clean the wiper arm ...
