Nissan Sentra B18 (2020-2025) Service Manual: Front Regulator
Exploded View
Exploded View
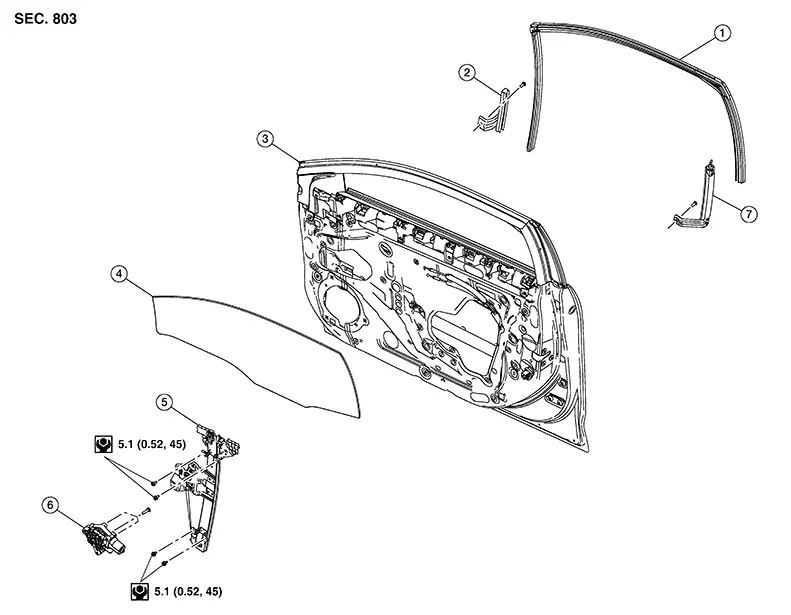
|
1. |
Door glass rubber run |
2. |
Front door glass front run |
3. |
Front door panel |
|
4. |
Front door glass |
5. |
Front door glass regulator |
6. |
Front power window motor |
|
7. |
Front door glass rear run |
Removal and Installation
Removal and Installation
REMOVAL
Note:
RH front door panel shown; LH side similar.
Remove the front door finisher. Refer to Removal and Installation.
Remove the vapor barrier.
CAUTION:
Use care to not damage or tear vapor barrier during removal.
Temporarily reconnect the main power window and door lock/unlock switch (LH door) or power window and door lock/unlock switch (RH door) to raise/lower the door glass until the door glass bolts can be seen through the access holes.
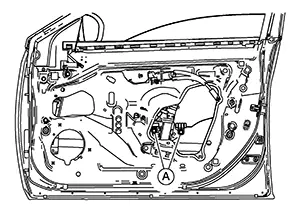
Remove the
front door regulator to glass bolts (A).
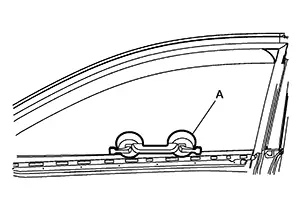
Raise the
front door glass and hold with a suitable tool (A).
Disconnect the harness connector from the front power window motor.
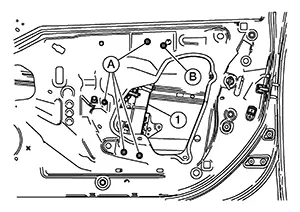
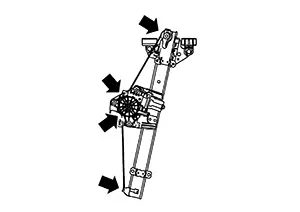
Remove
bolts (A) then loosen bolt (B) from the front regulator (1).
Remove the front regulator.
INSPECTION AFTER REMOVAL
Check the front door glass regulator for the following items.
-
Wire wear.
-
Regulator deformation.
-
Grease condition for each sliding part.
If a malfunction is detected, replace or grease it using multi-purpose grease as shown.
INSTALLATION
Installation is in the reverse order of removal.
Inspection and Adjustment
Inspection and Adjustment
SYSTEM INITIALIZATION (IF NECESSARY)
If any of the following occur, system initialization must be performed.
-
Electric power supply to power window switch or motor is interrupted by blown fuse or disconnecting battery cable, etc.
-
Removal and installation of the regulator assembly.
-
Removal and installation of the motor from the regulator assembly.
-
Removal and installation of the harness connector of the power window switch.
-
Operation of the regulator assembly as a unit.
-
Removal and installation of the door glass.
-
Removal and installation of the door glass run.
-
Window is partly opened and or closed multiple times with out being fully closed.
To perform system initialization, refer to Description.
INSPECT THE FUNCTION OF THE ANTI-PINCH SYSTEM.
To inspect the anti-pinch system, refer to Description.
Other materials:
Text messaging
WARNING
Laws in some jurisdictions may restrict the use of Text-to-Speech features.
Always check local regulations before using this function in your Nissan
Sentra.
Laws in some jurisdictions may limit the use of certain applications
and features, including social networking a ...
Rear Axle. Periodic Maintenance. Rear Wheel Hub. Inspection
Rear Wheel Hub. Inspection
Inspection
Inspection
COMPONENT PART
Check the mounting conditions (looseness, back
lash) of each component and component conditions (wear, damage) are
normal.
WHEEL HUB ASSEMBLY (BEARING-INTEGRATED
TYPE)
Check the following items, and replace the p ...
Driver Assistance Buzzer Circuit
Component Function Check
Component Function Check
CHECK DRIVER ASSISTANCE BUZZER
CONSULT
Select “ADAS buzzer 2� in
“Active Test� mode of “ICC/ADAS
2�.
Check that the function operates
...