Nissan Sentra B18 (2020-2025) Service Manual: Front Door Glass
Exploded View
Exploded View
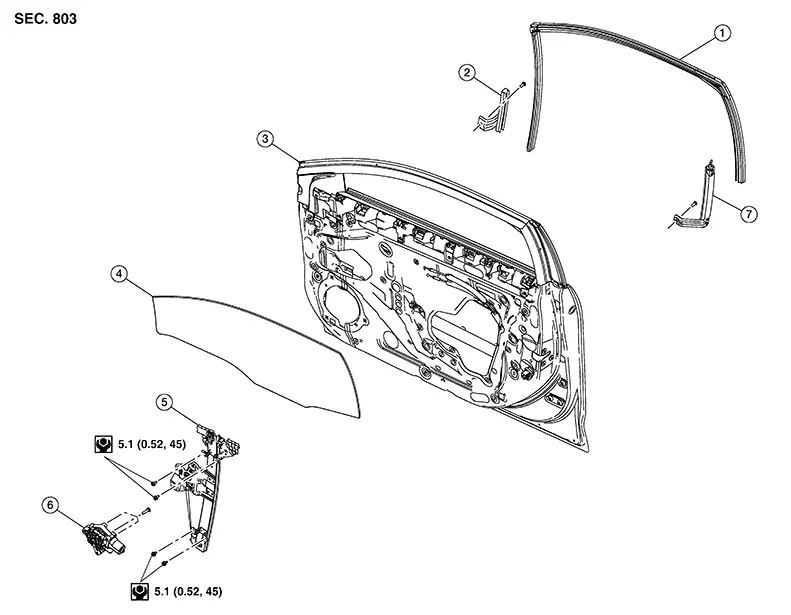
|
1. |
Door glass rubber run |
2. |
Front door glass front run |
3. |
Front door panel |
|
4. |
Front door glass |
5. |
Front door glass regulator |
6. |
Front power window motor |
|
7. |
Front door glass rear run |
Removal and Installation
Removal and Installation
REMOVAL
Warning:
-
Before servicing, turn ignition switch OFF, disconnect both battery terminals and wait at least three minutes.
-
Do not use air tools or electric tools for servicing.
Remove the front door finisher. Refer to Removal and Installation.
Remove the vapor barrier.
CAUTION:
Use care to not damage or tear vapor barrier during removal.
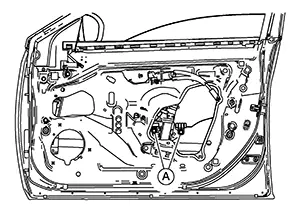
Temporarily reconnect the main power window and door lock/unlock switch (LH door) or power window and door lock/unlock switch (RH door) to raise/lower the door glass until the door glass bolts can be seen through the access holes.
Remove the
front door regulator to glass bolts (A).
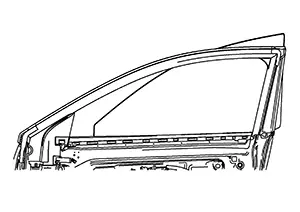
While
holding the front door glass, raise it at the rear end to pull the
front door glass out of the sash toward the outside of the
door.
INSTALLATION
Installation is in the reverse order of removal.
FRONT DOOR GLASS INSPECTION AFTER INSTALLATION
-
Check that the door glass is securely set into the glass run groove.
-
Lower the door glass slightly [approximately 10 to 20 mm (0.4 to 0.8 in)] and check that the clearance to the sash is parallel. If the clearance between the door glass and sash is not parallel, loosen the regulator bolts, guide rail bolts, and door glass and guide rail bolts to correct the glass position.
Inspection and Adjustment
Inspection and Adjustment
SYSTEM INITIALIZATION (IF NECESSARY)
If any of the following occur, system initialization must be performed.
-
Electric power supply to power window switch or motor is interrupted by blown fuse or disconnecting battery cable, etc.
-
Removal and installation of the regulator assembly.
-
Removal and installation of the motor from the regulator assembly.
-
Removal and installation of the harness connector of the power window switch.
-
Operation of the regulator assembly as a unit.
-
Removal and installation of the door glass.
-
Removal and installation of the door glass run.
-
Window is partly opened and or closed multiple times with out being fully closed.
To perform system initialization, refer to Description.
INSPECT THE FUNCTION OF THE ANTI-PINCH SYSTEM.
To inspect the anti-pinch system, refer to Description.
Other materials:
B20c7-15 A/c Clutch
Dtc Description
DTC Description
DTC DETECTION LOGIC
DTC No.
CONSULT screen terms
(Trouble diagnosis content)
DTC detection condition
...
Fuel Injector
Component Function Check
Component Function Check
INSPECTION START
Turn ignition switch to START.
Are any cylinders ignited?
YES >>
GO TO
2.
NO >>
Refer to Diagnosis Procedure.
CHECK FUEL INJECTOR FUNCTION
...
Brake Booster
Exploded View
Exploded View
1.
Brake booster
2.
Vacuum sensor
3.
Space ...