Nissan Sentra B18 (2020-2025) Service Manual: Av Control Unit
Exploded View
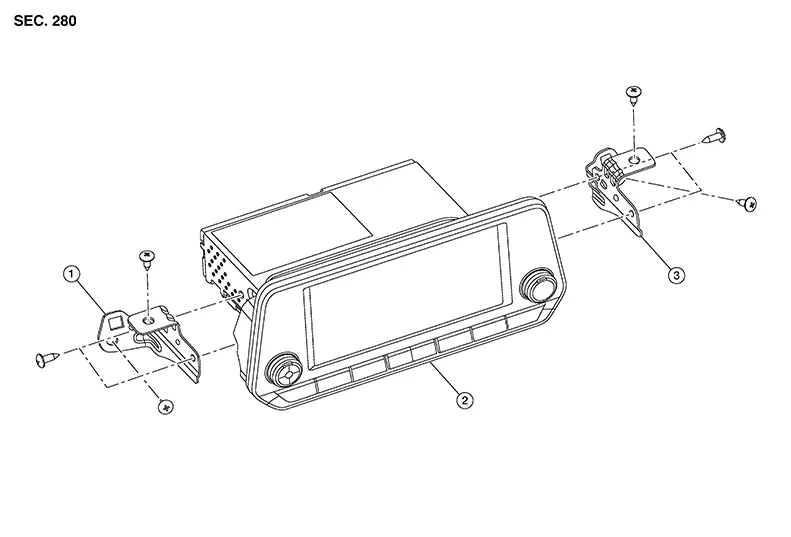
|
1. |
Audio unit bracket (LH) |
2. |
Audio unit |
3. |
Audio unit bracket (RH) |
Removal and Installation
REMOVAL
CAUTION:
When replacing AV control unit, perform "ADDITIONAL SERVICE WHEN REPLACING AV CONTROL UNIT". Refer to Description.
Disconnect the negative battery terminal. Refer to Battery Disconnect.
Remove cluster lid C. Refer to Removal and Installation
Remove the AV control unit screws, then pull out the AV control unit.
Disconnect the harness connectors from the AV control unit and remove.
If necessary, remove the AV control unit bracket (LH/RH) screws and the AV control unit brackets (LH/RH).
INSTALLATION
Installation is in the reverse order of removal.
CAUTION:
When replacing AV control unit, perform "ADDITIONAL SERVICE WHEN REPLACING AV CONTROL UNIT". Refer to Description.

 Rear View Camera
Removal and Installation
Removal and Installation
Removal
Remove
trunk lid finisher. Refer to Removal and Installation.
Remove
trunk lid damper bolts (A) and trunk lid damper (1). ...
Other materials:
Fuel Pump
Component Inspection
Component Inspection
CHECK FUEL PUMP
Turn ignition switch OFF.
Disconnect “fuel level sensor
unit and fuel pump” harness connector.
Check the resistance between
...
Precautions for Work
Precautions for Work
When removing or disassembling each component, be
careful not to damage or deform it. If a component may be subject
to interference, be sure to protect it with a shop cloth.
When removing (disengaging) components with a
screw ...
Keys
Remote keyless entry keyfob (if so equipped)
Integrated door lock keyfob
Key number plate
CAUTION
Do not leave the ignition key inside the
vehicle when you leave the vehicle.
A key number plate is supplied with your keys.
Record the key number and keep it in a safe place
(such as ...
