Nissan Sentra Owners Manual: LATCH (Lower Anchors and Tethers for CHildren) System
| WARNING Failure to follow the warnings and instructions for proper use and installation of child restraints could result in serious injury or death of a child or other passengers in a sudden stop or collision:
|
LATCH lower anchor location
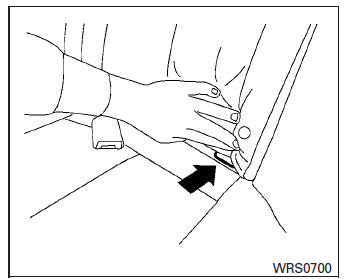
LATCH lower anchor location
The LATCH lower anchors are located at the rear of the seat cushion near the seatback. A label is attached to the seatback to help you locate the LATCH lower anchors.
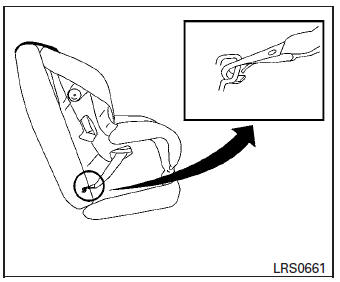
LATCH webbing-mounted attachment
Installing child restraint LATCH lower anchor attachments
LATCH compatible child restraints include two rigid or webbing-mounted attachments that can be connected to two anchors located at certain seating positions in your vehicle. With this system, you do not have to use a vehicle seat belt to secure the child restraint. Check your child restraint for a label stating that it is compatible with LATCH. This information may also be in the instructions provided by the child restraint manufacturer.
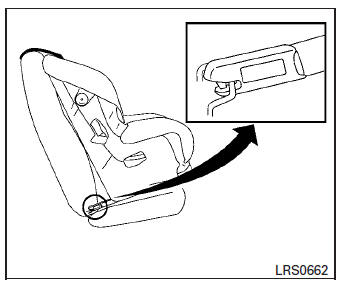
LATCH rigid-mounted attachment
When installing a child restraint, carefully read and follow the instructions in this manual and those supplied with the child restraint.
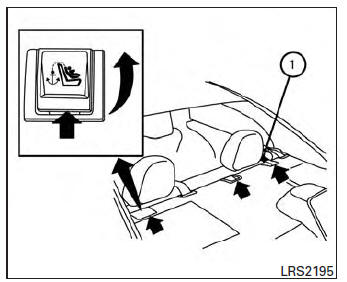
Top tether anchor point locations
| WARNING Child restraint anchorages are designed to withstand only those loads imposed by correctly fitted child restraints. Under no circumstances are they to be used to attach adult seat belts, or other items or equipment to the vehicle. Doing so could damage the child restraint anchorages. The child restraint will not be properly installed using the damaged anchorage, and a child could be seriously injured or killed in a collision. |
The child restraint top tether strap must be used when installing the child restraint with the LATCH lower anchor attachments or seat belts. See “Installing top tether strap” in this section.
If you have any questions when installing a top tether strap child restraint, consult your NISSAN dealer for details.
Anchor points 1 are located on the rear parcel shelf.
 Precautions on child restraints
WARNING
Failure to follow the warnings and instructions
for proper use and installation
of child restraints could result in
serious injury or death of a child or
o ...
 Rear-facing child restraint installation using LATCH
Refer to all Warnings and Cautions in the “Child
safety” and “Child restraints” sections before installing
a child restraint.
NISSAN does not recommend the use of the
lower anchors if th ...
Other materials:
Seat belt warning system
Seat Belt Warning System Does Not Function
1.SEAT BELT WARNING LIGHT
Turn ignition switch ON.
Does the seat belt warning lamp come ON?
YES >> GO TO 2.
NO >> • Check 10A fuse [No. 8, located in the fuse block (J/B)].
Check seat belt buckle switch (driver seat)
Check ha ...
Description
Number
Item
Description
1
Power supply
This means the power supply of fusible link or fuse.
2
Fusible link
“X” means the fusible link.
3
Number of fusible link/
fuse
This means the numbe ...
Diagnosis description : permanent diagnostic
trouble code (permanent DTC)
Permanent DTC is defined in SAE J1979/ISO 15031-5 Service $0A.
ECM stores a DTC issuing a command of turning on MIL as a permanent DTC and
keeps storing the DTC as
a permanent DTC until ECM judges that there is no presence of malfunction.
Permanent DTCs cannot be erased by using the erase f ...
