Nissan Sentra Service Manual: Door outside molding
Exploded view
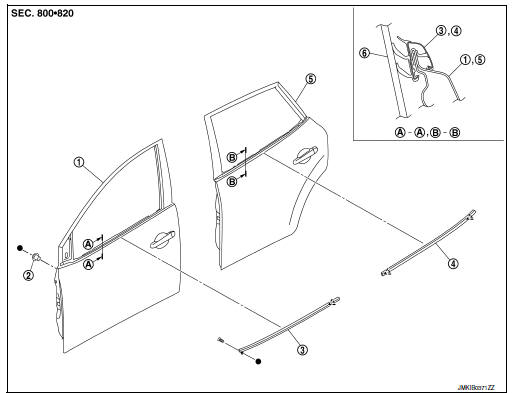
- Front door assembly
- Grommet
- Front door outside molding
- Rear door outside molding
- Rear door assembly
- Door glass
 Clip
Clip
Front door outside molding
FRONT DOOR OUTSIDE MOLDING : Removal and Installation
REMOVAL
- Remove front door mirror. Refer to MIR-18, "DOOR MIRROR ASSEMBLY : Removal and Installation".
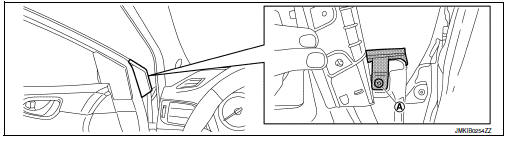
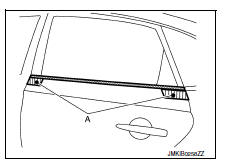
- Remove front door outside molding screw (A).
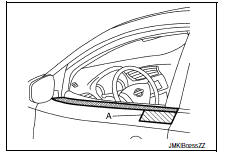
- Apply protective tape (A) to protect the component from damage.
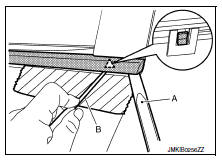
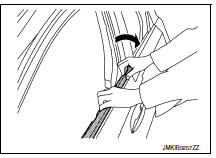
- Release rear end of front door outside molding clip using suitable tools (A,B).
 Clip
Clip
- Rotate and lift as shown to remove the front door outside molding.
INSTALLATION
Installation is in the reverse order of removal.
Rear door outside molding
Rear door outside molding : removal and installation
REMOVAL
- Apply protective tape (A) to protect the component from damage.
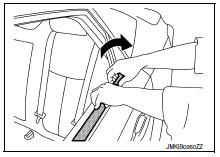
- Release clip of rear door outside molding front and rear end, using suitable tools (A, B).
 : Clip
CAUTION:
Use care when lifting rear door outside molding to prevent damage.

- Rotate and lift as shown to remove the rear door outside molding.
INSTALLATION
Installation is in the reverse order of removal.
 Door sash tape
Exploded view
Front door sash upper tape
Front door assembly
Rear door assembly
Front door sash rear tape
Rear door sash front tape
Rear door sash rear tape
Rear door sash upper ta ...
 Door parting seal
Exploded View
Rear door panel
Rear door parting seal
Front door parting seal
Front door panel
Pawl
Front
Removal and Installation
Release parting seal pawls, then remove parti ...
Other materials:
Door handle
Front door handle
Front door handle : exploded view
Outside handle bracket
Front gasket
Outside handle
Intelligent key button
Door key cylinder rod
Inside handle assembly
Rear gasket
Front door handle : removal and installation - inside handle
REMOVAL
Remove front door ...
Battery
Exploded view
Battery frame
Battery rods
Battery cover
Battery bracket
Battery tray
Battery
Front
Removal and installation (battery)
Removal
Loosen the battery terminal nuts and disconnect both battery negative
and positive terminals.
Caution:
To prevent damage to t ...
Brake pedal
Exploded View
WITHOUT BRAKE PEDAL POSITION SWITCH
Snap pin
Brake pedal assembly
Brake pedal pad
Stop lamp switch
Clip
Clevis pin
Apply multi-purpose grease.
WITH BRAKE PEDAL POSITION SWITCH
Snap pin
Brake pedal assembly
Brake pedal pad
Brake pedal position switch
...
