Nissan Sentra B18 (2020-2025) Service Manual: Removal and Installation
A/c Switch Assembly
Removal and Installation
Removal and Installation
REMOVAL
Remove instrument finisher B. Refer to Removal and Installation.
Remove A/C switch assembly screws
(A). 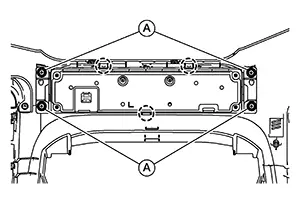
|
|
: Pawl |

Using a suitable tool, release pawls and remove A/C switch assembly.
INSTALLATION
Installation is in the reverse order of removal.
A/c Auto Amp.
Removal and Installation
Removal and Installation
REMOVAL
Remove center console assembly. Refer to Removal and Installation.
Disconnect harness connectors from A/C auto amp.
Remove
screws (A) and remove A/C auto amp. 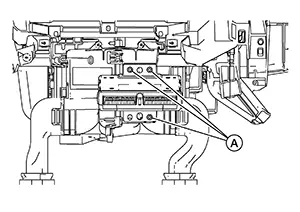
INSTALLATION
Installation is in the reverse order of removal.
Ambient Sensor
Removal and Installation
Removal and Installation
REMOVAL
Remove front bumper. Refer to Removal and Installation.
Disconnect
the harness connector (A) from the ambient sensor (1). 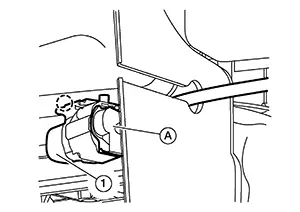
|
|
: Pawl |
Using a suitable tool, release pawls and remove the ambient sensor.
INSTALLATION
Installation is in the reverse order of removal.
In-Vehicle Sensor
Removal and Installation
Removal and Installation
REMOVAL
Remove instrument finisher B. Refer to Removal and Installation.
Remove
screw (A) and remove in-Nissan Sentra vehicle sensor (1). 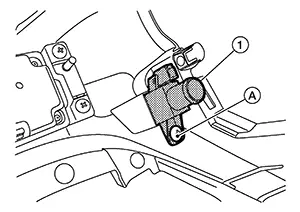
INSTALLATION
Installation is in the reverse order of removal.
Sunload Sensor
Removal and Installation
Removal and Installation
REMOVAL
Using a
suitable tool, release the pawls and remove sunload sensor (1) from
instrument panel assembly (2). 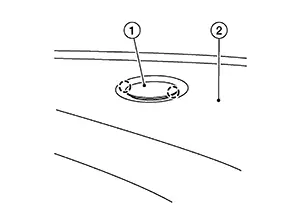
|
|
: Pawl |
Disconnect the harness connector and remove the sunload sensor.
INSTALLATION
Installation is in the reverse order of removal.
Intake Sensor
Removal and Installation
Removal and Installation
REMOVAL
Remove evaporator. Refer to Removal and Installation.
Separate intake sensor from evaporator.
INSTALLATION
Installation is in the reverse order of removal.
Refrigerant Pressure Sensor
Removal and Installation
Removal and Installation
The refrigerant pressure sensor is an integral part of the high pressure pipe.
If replacement of the refrigerant pressure sensor is necessary, replace the high pressure pipe. Refer to Removal and Installation.
Door Motor
Exploded View
Exploded View
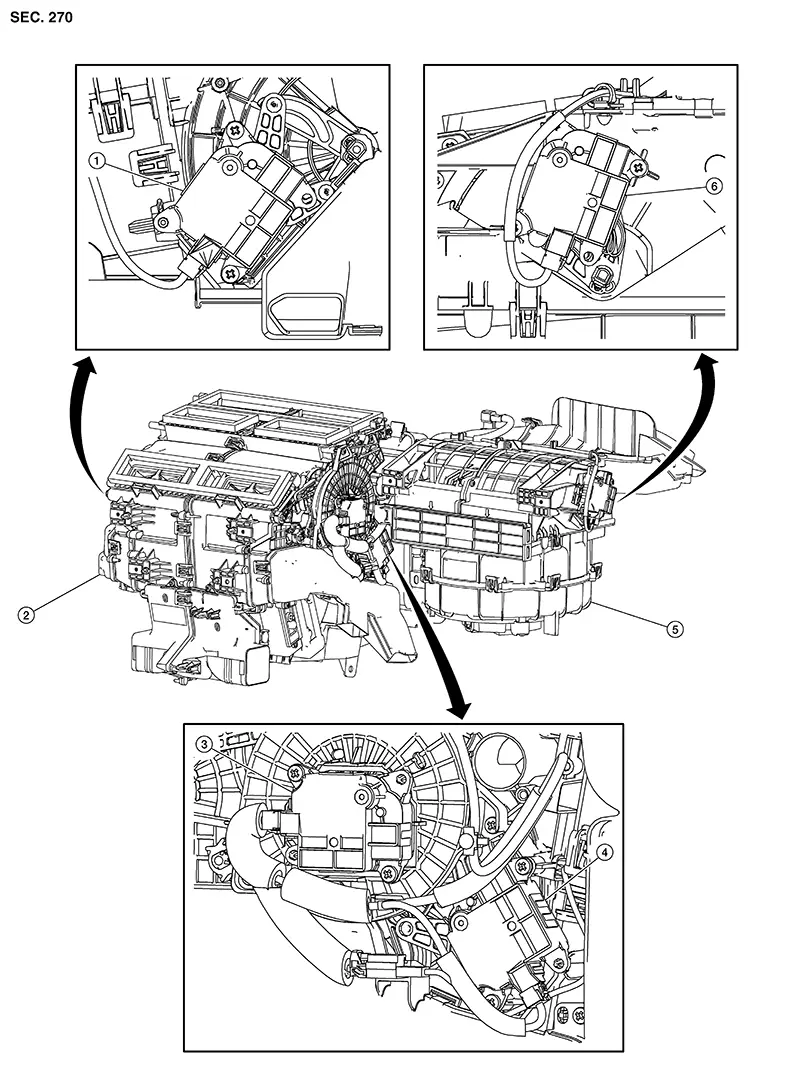
|
1. |
Air mix door motor LH |
2. |
Heating and cooling unit assembly |
3. |
Mode door motor |
|
4. |
Air mix door motor RH |
5. |
Blower motor unit |
6. |
Intake door motor |
Intake Door Motor
Removal and Installation
Removal and Installation
REMOVAL
Remove heating and cooling unit assembly. Refer to Removal and Installation.
Disconnect harness connector from intake door motor.
Remove intake door motor screws and the intake door motor.
INSTALLATION
Installation is in the reverse order of removal.
Mode Door Motor
Removal and Installation
Removal and Installation
REMOVAL
Remove knee air bag module RH. Refer to Removal and Installation.
Disconnect harness connector from mode door motor.
Remove mode door motor screws and remove mode door motor.
INSTALLATION
Installation is in the reverse order of removal.
Air Mix Door Motor
Removal and Installation - Air Mix Door Motor Rh
Removal and Installation - Air Mix Door Motor RH
REMOVAL
Remove knee air bag module RH. Refer to Removal and Installation.
Disconnect the harness connector from air mix door motor RH.
Remove air mix door motor RH screws and remove air mix door motor RH.
INSTALLATION
Installation is in the reverse order of removal.
Removal and Installation - Air Mix Door Motor Lh
Removal and Installation - Air Mix Door Motor LH
REMOVAL
Remove left knee air bag module. Refer to Removal and Installation.
Disconnect harness connector from air mix door motor LH.
Remove air mix door motor LH screws and remove air mix door motor LH.
INSTALLATION
Installation is in the reverse order of removal.
Other materials:
Dtc/circuit Diagnosis. Position Switch
Position Switch
Back-Up Lamp Switch
Component Inspection
Component Inspection
CHECK BACK-UP LAMP SWITCH
Disconnect position switch harness connector.
Refer to Removal and Installation.
...
P0078 Evt Control Solenoid Valve
Dtc Description
DTC Description
DTC DETECTION LOGIC
DTC
CONSULT screen terms
(Trouble diagnosis
content)
DTC detection
condition
...
Rear Air Spoiler
Exploded View
Exploded View
1.
Trunk lid
2.
Rear air spoiler
3.
Double ...