Nissan Sentra Service Manual: Rear regulator
Exploded View
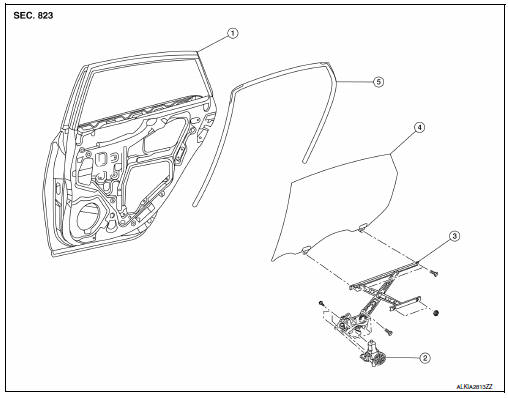
- Rear door panel
- Rear door glass regulator motor
- Rear door glass regulator
- Rear door glass
- Rear door glass rubber run
Removal and Installation
NOTE:
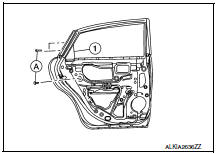
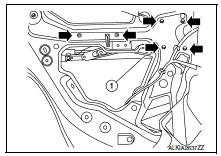
RH rear door panel shown; LH side similar
REMOVAL
- Remove the rear door finisher. Refer to INT-19, "Removal and Installation".
- Remove the vapor barrier.
CAUTION:
Use care to not damage or tear vapor barrier during removal.
- Partially remove the rear door window run rubber.
- Remove bolts (A) and the rear door glass rear run channel (1).
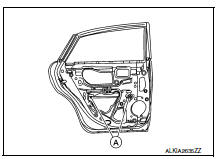
- Temporarily reconnect the rear power window switch to raise/ lower the rear door glass until the rear door regulator to glass bolts (A) can be seen through the access holes.
- Remove the rear door regulator to glass bolts (A).
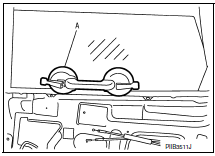
- Raise up the rear door glass and hold with a suction lifter (A).
- Disconnect the harness connector from the rear door glass regulator.
- Remove nuts/bolts (
 ) and
) and
the rear door glass regulator (1).
INSPECTION AFTER REMOVAL
Check the rear door glass regulator for the following items. If a malfunction is detected, replace or grease it.
- Gear wear
- Regulator deformation
- Grease condition for each sliding part
- Apply multi-purpose grease at sliding points.
INSTALLATION
Installation is in the reverse order of removal.
 Rear door glass
Removal and Installation
REMOVAL
NOTE:
LH rear door panel shown; RH similar.
Remove the rear door finisher. Refer to INT-19, "Removal and
Installation".
Remove the vapor barrier. ...
 Rear power window motor
Removal and Installation
REMOVAL
Remove the rear door glass regulator (1). Refer to GW-21,
"Removal and Installation"
Remove the screws and the rear power window motor (2).
I ...
Other materials:
Structure and operation
Positive Crankcase Ventilation
This system returns blow-by gas to the intake manifold.
The positive crankcase ventilation (PCV) valve is provided to conduct crankcase
blow-by gas to the intake
manifold.
During partial throttle operation of the engine, the intake manifold sucks the
bl ...
Front wiper motor lo circuit
Component function check
1. Check front wiper lo operation
Ipdm e/r auto active test
Start ipdm e/r auto active test. Refer to pcs-9, "diagnosis description"
(with intelligent key system) or
pcs-37, "diagnosis description" (without intelligent key system).
Check tha ...
M&a branch line circuit
Diagnosis procedure
1.Check connector
Turn the ignition switch off.
Disconnect the battery cable from the negative terminal.
Check the terminals and connectors of the combination meter for damage,
bend and loose connection
(unit side and connector side).
Is the inspection result nor ...
