Nissan Sentra B18 (2020-2025) Service Manual: P052a Intake Valve Timing Control
Dtc Description
DTC Description
DTC DETECTION LOGIC
|
DTC No. |
CONSULT screen terms (Trouble diagnosis content) |
DTC detecting condition |
|---|---|---|
|
P052A |
CAMSHAFT POSITION TIMING B1 (Cold start ŌĆ£AŌĆØ camshaft position timing over-advanced bank 1) |
There is a gap between angle of target and phase-control angle degree when the engine is in a cold condition. |
POSSIBLE CAUSE
-
Crankshaft position sensor
-
Intake camshaft position sensor
-
Intake valve timing control actuator
-
Accumulation of debris to the signal pick-up portion of the camshaft
-
Timing chain installation
-
Foreign matter caught in the oil groove for intake valve timing control
FAIL-SAFE
Engine Control System
|
Engine operating condition in fail-safe mode |
||
|---|---|---|
|
Fail safe mode |
Nissan Sentra Vehicle behavior |
|
|
Device fix mode |
|
|
|
Others |
ECM stops the electric valve timing control. (The camshaft returns to the position of most retard angle.) |
|
Idle Start/Stop System
When a DTC is detected, the start/stop indicator lamp blinks slowly and the idle start/stop system operation is prohibited.
When ECM detects error while operating the idle start/stop system, ECM restarts the engine.
Confirmation Procedure
Confirmation Procedure
-
PRECONDITIONING
TESTING CONDITION:
Before performing the following procedure, confirm that battery voltage is 10 V or more at idle.
 With CONSULT
-
Turn ignition switch OFF and wait at least 10 seconds.
-
Turn ignition switch ON.
-
Turn ignition switch OFF and wait at least 10 seconds.
-
Turn ignition switch ON.
-
On the CONSULT screen, select ŌĆ£ENGINEŌĆØ >> ŌĆ£DATA MONITORŌĆØ >> ŌĆ£COOLAN TEMP/SŌĆØ.
-
Check ŌĆ£COOLAN TEMP/SŌĆØ indication value.
 With GST
Follow the procedure ŌĆ£With CONSULTŌĆØ above.
Is the value of ŌĆ£COOLAN TEMP/SŌĆØŌłÆ5┬░C (23┬░F) and 45┬░C (113┬░F)?
YES >>GO TO 2.
NO-1 [if it is below ŌłÆ5┬░C (23┬░F)] >>Warm up the engine until the value of ŌĆ£COOLAN TEMP/SŌĆØ indicates ŌłÆ5┬░C (23┬░F) and 45┬░C (113┬░F). And then GO TO 2.
NO-2 [if it is above 45┬░C (113┬░F)] >>Cool the engine down to the value of ŌĆ£COOLAN TEMP/SŌĆØ indicates ŌłÆ5┬░C (23┬░F) and 45┬░C (113┬░F). And then GO TO 2.
-
-
PERFORM DTC CONFIRMATION PROCEDURE
-
Turn ignition switch OFF and wait at 10 seconds.
-
Turn ignition switch ON.
-
Set the selector lever in N range.
-
Start the engine and let it idle for 20 seconds or more.
-
Check 1st trip DTC.
Is 1st trip DTC detected?
YES >>Refer to DTC Diagnosis Procedure.
NO >>INSPECTION END
-
Dtc Diagnosis Procedure
DTC Diagnosis Procedure
-
INSPECTION START
With CONSULT>>GO TO 2.
Without CONSULT>>GO TO 3.
-
CHECK VTC POSITION
With CONSULT-
Turn ignition switch ON.
-
On the CONSULT screen, select ŌĆ£ENGINEŌĆØ >> ŌĆ£DATA MONITORŌĆØ >> ŌĆ£COOLAN TEMP/SŌĆØ.
-
Check that the ŌĆ£COOLAN TEMP/SŌĆØ indication value is between ŌłÆ5┬░C (23┬░F) and 45┬░C (113┬░F).
-
Start engine and wait at least 5 seconds.
-
On the CONSULT screen, select ŌĆ£ENGINEŌĆØ >> ŌĆ£DATA MONITORŌĆØ >> ŌĆ£INT/V TIM (B1)ŌĆØ.
-
Check that the data monitor item indicates as follows:
Item
Value (┬░CA)
INT/V TIM (B1)
10 ┬▒ 2
Is the inspection result normal?
YES >>GO TO 10.
NO >>GO TO 3.
-
-
CHECK OIL PRESSURE WARNING LAMP
-
Start engine.
-
Check that oil pressure warning lamp is not illuminated.

Is oil pressure warning lamp illuminated?
YES >>Refer to Inspection.
NO >>GO TO 4.
-
-
CHECK INTAKE VALVE TIMING CONTROL ACTUATOR
Perform Component Inspection of the intake valve timing intermediate lock control actuator. Refer to DTC Diagnosis Procedure.
Is the inspection result normal?
YES >>GO TO 5.
NO >>Repair or replace error-detected parts.
-
CHECK CRANKSHAFT POSITION SENSOR
Perform Component Inspection of the crankshaft position sensor. Refer to Component Inspection.
Is the inspection result normal?
YES >>GO TO 6.
NO >>Repair or replace error-detected parts.
-
CHECK INTAKE CAMSHAFT POSITION SENSOR
Perform Component Inspection of the intake camshaft position sensor. Refer to Component Inspection.
Is the inspection result normal?
YES >>GO TO 7.
NO >>Repair or replace error-detected parts.
-
CHECK CAMSHAFT (INTAKE)
Check the following.
-
Accumulation of debris on the signal plate of camshaft
 front end
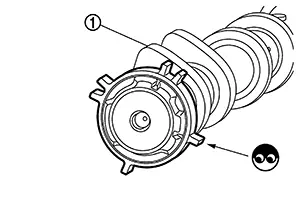
-
Chipping signal plate of camshaft front end
Is the inspection result normal?
YES >>GO TO 8.
NO >>Remove debris and clean the signal plate of camshaft front end or replace camshaft. Refer to Removal and Installation.
-
-
CHECK TIMING CHAIN INSTALLATION
Check service records for any recent repairs that may cause timing chain misalignment.
Are there any service records that may cause timing chain misalignment?
YES >>Check timing chain installation. Refer to Removal and Installation.
NO >>GO TO 9.
-
CHECK LUBRICATION CIRCUIT
Perform ŌĆ£Inspection of Camshaft Sprocket (INT) Oil GrooveŌĆØ. Refer to Inspection.
Is the inspection result normal?
YES >>GO TO 10.
NO >>Clean lubrication line.
-
CHECK INTERMITTENT INCIDENT
Refer to Intermittent Incident.
>>INSPECTION END
Other materials:
Exterior. Precaution. Precautions
Precautions
Precaution for Supplemental Restraint System (srs) "air Bag" and "seat Belt Pre-Tensioner"
Precaution for Supplemental Restraint System (SRS) "AIR BAG" and "SEAT BELT PRE-TENSIONER"
The Supplemental Restraint System such as
ŌĆ£AIR BAGŌĆØ and ŌĆ£SEAT BELT PRE-T ...
Cold weather driving
Freeing a frozen door lock
To help prevent the door locks of your Nissan Sentra from freezing in cold weather,
apply a suitable de-icing agent directly into the keyhole. If a lock does become
frozen, gently warm the mechanical key before inserting it into the keyhole. As
an alternative, use t ...
Handling Precaution
Precaution for Idle Start/stop System
Precaution for Idle Start/Stop System
PRECAUTIONS FOR IDLE START/STOP SYSTEM OPERATION
The operation of the idle start/stop system system needs to
satisfy various conditions. For details of the conditions, refer to System Description.
The idle start ...