Nissan Sentra B18 (2020-2025) Service Manual: INSTALLATION. Sonar Buzzer. Removal and Installation
CAUTION:
Verify that the connector direction is within the specification shown when assembling the bumper fascia.
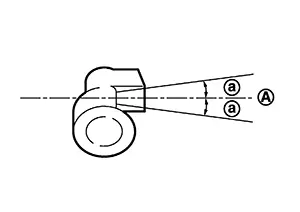
|
(A) |
: Horizontal position |
|
(a) |
: ±10° |
Install sonar sensor outer to sensor cover.
Degrease and clean the inner side
of the rear bumper fascia and apply adhesion promoter to the area
shown (A). 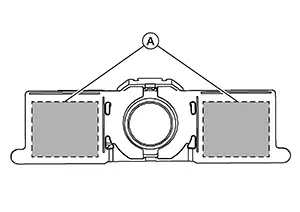
Let the adhesion promoter dry for
more than 3 minutes and peel off the double sided tape film, and then
taking precautions not to contact the bumper with the double sided
tape (A), bend the sensor cover in the direction shown. 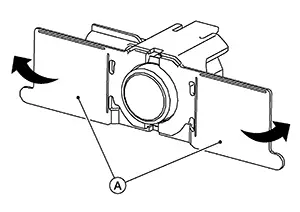
Match the part of the sonar sensor
(A) shown in the figure to the sensor installing hole of the rear
bumper fascia. 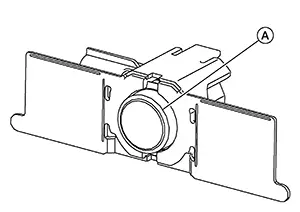
Remove the sensor from the sensor
cover and press the adhesion face (A) for more than 2 seconds to securely
bond the sensor cover to rear bumper fascia inner. 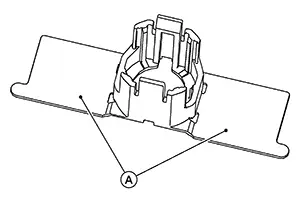
|
Target pressure |
: 50.0 N (5.1 kg,) |
CAUTION:
-
When temperature is less than 15 C (59 F), use a drier, etc., to warm the adhesion face and proceed.
-
After installing sensor cover, do not move cover for 2–3 hours.
Install sensor to the sensor cover.
Shake the part of the sensor cover
(A) up and down and then right and left to confirm that the cover
has been installed (bonded) firmly. 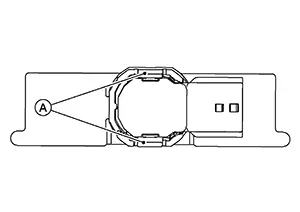
Connect the harness connector to the sonar sensor outer.
Sonar Buzzer. Removal and Installation. Removal and Installation
Removal and Installation
REMOVAL
Remove instrument lower panel LH. Refer to Removal and Installation.
Remove
screw (A) from sonar buzzer (1). 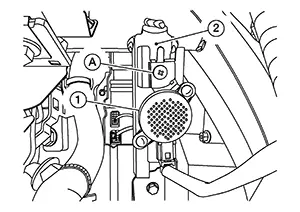
Disconnect the harness connector from sonar buzzer (1) and remove sonar buzzer from steering member (2).
INSTALLATION
Installation is in the reverse order of removal.
Other materials:
Hazard Switch
Component Inspection
Component Inspection
CHECK HAZARD SWITCH
Ignition switch OFF.
Disconnect hazard switch connector.
Check continuity between hazar ...
Operating range
The NISSAN Intelligent Key functions on the Nissan Sentra can only be used when
the Intelligent Key is located within the specified operating range of the request
switch (if so equipped) 1. This ensures secure and reliable communication between
the vehicle and the Intelligent Key system.
...
P1534 Cruise Control
Dtc Description
DTC Description
DTC DETECTION LOGIC
DTC
CONSULT screen terms
(Trouble diagnosis
content)
DTC detection
condition
...