Nissan Sentra B18 (2020-2025) Service Manual: Fuel Filler Lid Opener
Exploded View
Exploded View
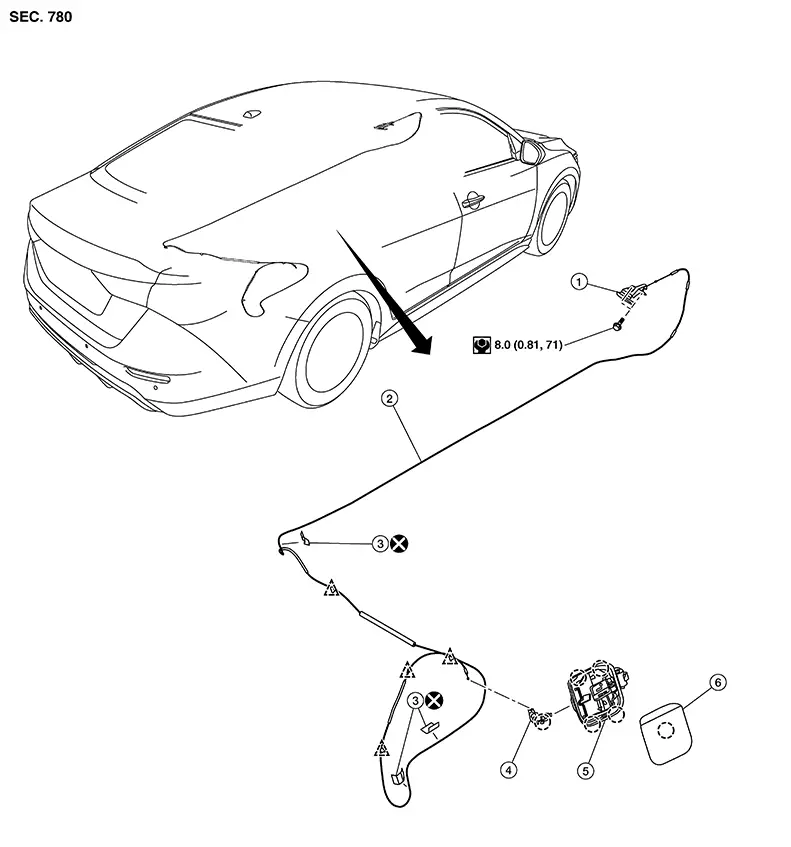
|
1. |
Fuel filler lid opener lever |
2. |
Fuel filler lid opener cable |
3. |
Cable protector |
|
4. |
Fuel filler lid lock assembly |
5. |
Fuel filler base |
6. |
Fuel filler lid |
|
|
Clip |
|
Pawl |
||


Fuel Filler Lid
Removal and Installation
Removal and Installation
REMOVAL
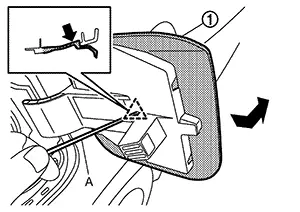
Fully open fuel filler lid.
Using
suitable tool (A) release clip and remove fuel filler lid (1) in
direction shown.
|
|
:Clip |
INSTALLATION
Installation is in the reverse order of removal.
Fuel Filler Base
Removal and Installation
Removal and Installation
REMOVAL
Remove fuel filler lid. Refer to Removal and Installation.
Remove fuel filler lid lock. Refer to Removal and Installation.
Using
suitable tool remove fuel cap pin (A) and fuel cap assembly. 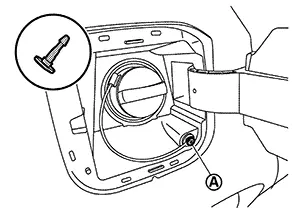
Remove the rear wheel and tire (RH) using power tool. Refer to Removal and Installation.
Loosen fuel
filler tube nut (A) and bolt (B). 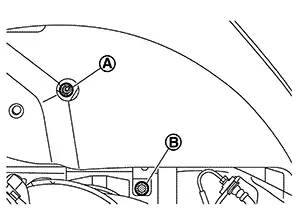
Using
suitable tool release pawl at location (A) from the inside of the
Nissan Sentra vehicle then release pawl at location (B).
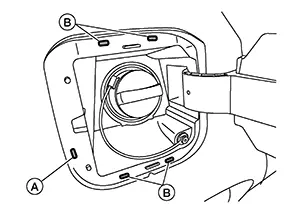 Note:
Note: 
Be careful not to damage gaskets and body panelwhen removing fuel filler base.
Remove fuel
filler base (1) in direction shown. 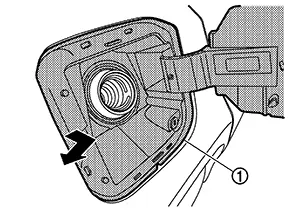 Note:
Note:
Be careful not to damage gaskets and body panelwhen removing fuel filler base.
INSTALLATION
Installation is in the reverse order of removal.
CAUTION:
After installation, check fuel filler lid open/close and lock/unlock operation.
Fuel Filler Opener Cable
Removal and Installation
Removal and Installation
REMOVAL
Remove fuel filler lid opener lever bolts.
Disconnect
fuel filler lid opener cable (1) from fuel filler lid opener lever
(2) as shown.
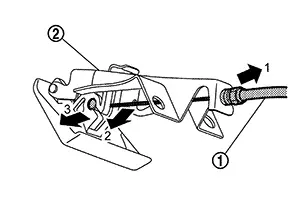
Remove dash side finisher (LH). Refer to Removal and Installation.
Remove center pillar lower finisher (LH). Refer to Removal and Installation.
Remove seat cushion assembly. Refer to Removal and Installation .
Remove trunk side finisher (LH). Refer to Removal and Installation.
Remove the fuel filler lid opener cable from fuel filler lid lock assembly. Refer to Removal and Installation.
Release
each harness protector (1), and then remove fuel filler lid opener
cable (2).
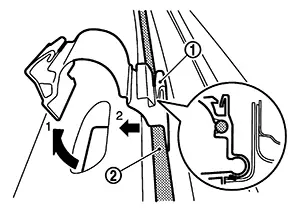
INSTALLATION
Installation is in the reverse order of removal.
CAUTION:
After installation, check fuel filler lid assembly open/close, lock/unlock operation.
Fuel Filler Lid Lock
Removal and Installation
Removal and Installation
REMOVAL
Fully open fuel filler lid.
Remove trunk side finisher (LH). Refer to Removal and Installation.
Release
clip (A) and remove fuel filler lid lock assembly (1) in direction
shown.
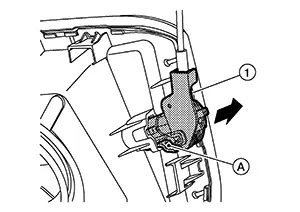
Disconnect
fuel filler lid opener cable (1) from fuel filler lid lock assembly
in direction shown. 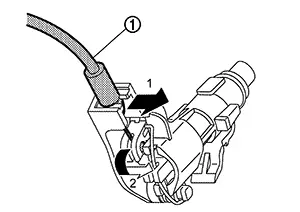
INSTALLATION
Installation is in the reverse order of removal.
CAUTION:
After installation, check fuel filler lid assembly open/close, lock/unlock operation.
Other materials:
P0181 Ftt Sensor
Dtc Description
DTC Description
DTC DETECTION LOGIC
DTC
CONSULT screen terms
(Trouble diagnosis
content)
DTC detection
conditi ...
U1300 Av Communication Circuit
Dtc Description
DTC Description
DTC DETECTION LOGIC
DTC No.
CONSULT screen terms
(Trouble diagnosis
content)
DTC detection condition
...
U1321-55 Configuration Unfinished
Dtc Description
DTC Description
DTC DETECTION LOGIC
DTC No.
CONSULT screen terms
(Trouble diagnosis
content)
DTC detection condition
...