Nissan Sentra Service Manual: Front door finisher
Exploded View
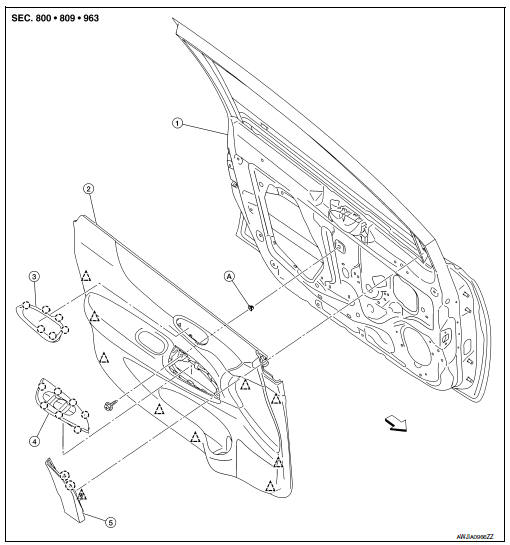
- Front door panel
- Front door finisher
- Inside door handle escutcheon
- Main power window and door lock/ unlock switch finisher
- Door mirror corner finisher
- Grommet
 Clip
Clip
 Pawl
Pawl
 Front
Front
NOTE:
LH side shown; RH similar.
Removal and Installation
CAUTION:
- When removing, always use a suitable tool that is made of plastic to prevent damage to the parts.
- Do not damage the door panel.
REMOVAL
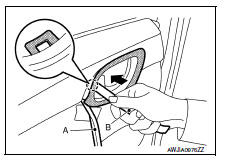
- Remove door mirror corner finisher (1) according to numerical order of arrows as shown.
- Remove inside door handle escutcheon.
- Apply protective tape (A) to protect the component from damage as shown.
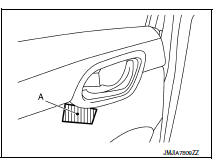
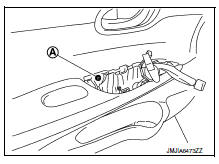
- Insert a suitable tool (A) as shown between inside door handle escutcheon and inside door handle.
- With suitable tool (A) in position, insert a second suitable tool (B) as shown, then release pawl.
 Pawl
Pawl
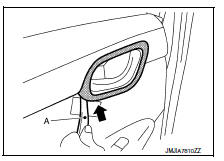
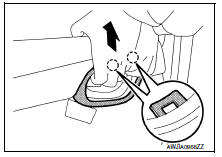
- Pull upward on the inside door handle escutcheon as shown to release the pawls on the upper portion of inside door handle escutcheon.
 Pawl
Pawl
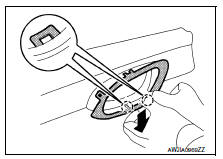
- Press down on the inside door handle escutcheon as shown to release the pawls on the lower portion of inside door handle escutcheon.
 Pawl
Pawl
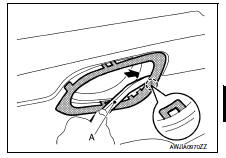
- Insert a suitable tool (A) as shown to release the remaining pawl and remove.
 Pawl
Pawl
- Remove the main power window and door lock/unlock switch (LH). Refer to PWC-70, "Removal and Installation".
- Remove the main power window and door lock/unlock switch (RH). Refer to PWC-71, "Removal and Installation".
- Remove front door finisher.
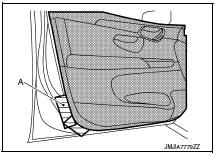
- Remove front door finisher screw (A).
- Apply protective tape (A) to protect the component from damage as shown.
- Release front door finisher clips using a suitable tool (A) as shown.
 Clip
Clip
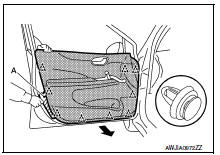
- Remove front door finisher as shown.
INSTALLATION
Installation is in the reverse order of removal
CAUTION:
When installing, check that clips are accurately aligned with the holes on the door panel, then press in.

 Rear door finisher
Exploded View
Rear door panel
Rear door finisher
Inside door handle escutcheon
Rear power window switch finisher
Grommet
Clip
Pawl
Front
Removal and Installation
CAUTION: ...
Other materials:
NISSAN Intelligent Key® battery discharge
If the battery of the NISSAN Intelligent Key® is
discharged, or environmental conditions interfere
with the Intelligent Key operation, start the engine
according to the following procedure:
Place the shift lever in the P (Park) position.
Firmly apply the foot brake.
Touch the ignitio ...
P1550 Battery current sensor
DTC Logic
DTC DETECTION LOGIC
DTC No.
CONSULT screen terms
(Trouble diagnosis content)
DTC detecting condition
Possible cause
P1550
BAT CURRENT SENSOR
(Battery current sensor)
The output voltage of the battery current
sensor remains within the specified
r ...
U0101 can comm circuit
Description
CAN (Controller Area Network) is a serial communication line for real time
application. It is an on-vehicle multiplex
communication line with high data communication speed and excellent error
detection ability. Many electronic
control units are equipped onto a vehicle, and each co ...
