Nissan Sentra Service Manual: Washer nozzle & tube
Exploded view

- Check valve
- Washer tube
- Washer tank
- Washer pump
- Washer nozzle
 Clip
Clip
Washer nozzle
Washer nozzle : removal and installation
REMOVAL
- Disconnect the washer nozzle from the hood by pushing on the nozzle in the order and direction shown.
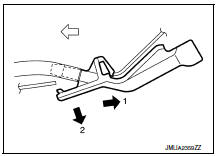
- Disconnect the washer tube from the washer nozzle.
- Remove the washer nozzle.
INSTALLATION
Installation is in the reverse order of removal.
CAUTION:
Adjust the nozzle spray pattern. Refer to WW-55, "WASHER NOZZLE : Adjustment".
Washer nozzle : adjustment
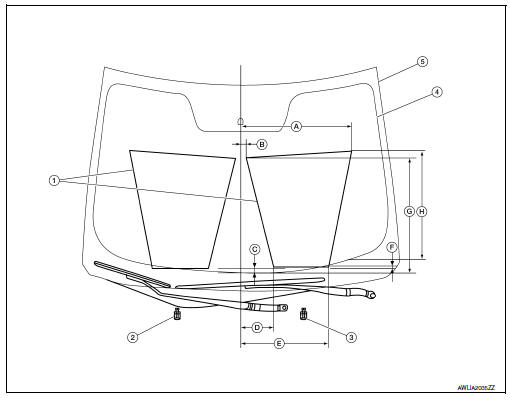
- Washer fluid spray pattern
- Washer nozzle (RH)
- Washer nozzle (LH)
- Black print
- Windshield glass
- 487.0 mm (19.2 in)
- 22.2 mm (0.9 in)
- 15.3 mm (0.6 in)
- 145.9 mm (5.7 in)
- 384.9 mm (15.2 in)
- 15.0 mm (0.6 in)
- 499.7 mm (19.7 in)
- 470.2 mm (18.5 in)
NOTE:
Spray position for (LH) shown. (RH) is symmetrical.
Insert a suitable tool into the nozzle hole (A) and move up/down and left/right to adjust the spray position of each nozzle (1).
Washer tube
Washer tube : removal and installation
REMOVAL
- Drain the washer fluid.
- Disconnect the washer tube from the washer nozzles (LH/RH). Refer to WW-54, "WASHER NOZZLE : Removal and Installation".
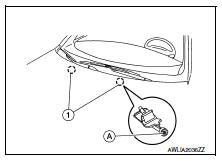
- Remove the front under cover. Refer to EXT-30, "FRONT UNDER COVER : Removal and Installation".
- Disconnect the washer tube from the washer pump.
- Remove the washer tube from the clips and remove the washer tube.
INSTALLATION
Installation is in the reverse order of removal.
NOTE:
Fill washer tank with specified amount of fluid. Refer to WW-64, "Specifications".
 Washer tank
Exploded view
Washer tank inlet
Washer tank
Washer level switch
Washer tank seal
Washer pump
Removal and installation
REMOVAL
Drain the washer fluid.
Remove the front under ...
 Front wiper arm
Exploded View
Wiper blade (RH)
Wiper arm (RH)
Wiper drive assembly
Wiper arm (LH)
Wiper blade (LH)
Removal and Installation
REMOVAL
Remove the wiper arm cap.
Remove the wipe ...
Other materials:
Adjustment of steering angle sensor neutral position
Description
Refer to the table below to determine if adjustment of steering
angle sensor neutral position is required.
×: Required –: Not required
Work Procedure
ADJUSTMENT OF STEERING ANGLE SENSOR NEUTRAL POSITION
CAUTION:
To adjust neutral position of steering angle sensor, ...
Regulatory Information
FCC Regulatory information
CAUTION: To maintain compliance with
FCC’s RF exposure guidelines, use only the
supplied antenna. Unauthorized antenna,
modification, or attachments could damage
the transmitter and may violate FCC regulations.
Operation is subject to the following two cond ...
The seat belt reminder warning
continues sounding, or does not
sound
Description
Seat belt reminder warning does not sound.
Seat belt reminder warning sounds continuously.
Diagnosis procedure
1.Check seat belt warning lamp
Turn ignition switch on.
Check the operation of the seat belt warning lamp in the combination
meter.
Is the inspection ...
