Nissan Sentra B18 (2020-2025) Service Manual: Removal and Installation
REMOVAL
Discharge the refrigerant. Refer to Recycle Refrigerant.
Remove the front bumper. Refer to Removal and Installation.
Remove air guides. Refer to Exploded View.
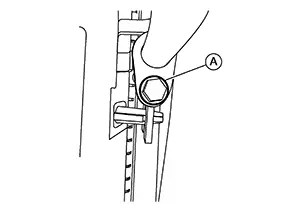
Remove bolt (A) and disconnect high-pressure flexible hose from condenser.
CAUTION:
Cap or wrap the joint of the hose with suitable material such as vinyl tape to avoid the entry of air.
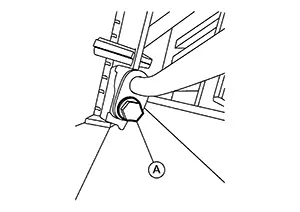
Remove bolt (A) and disconnect high-pressure pipe from condenser.
CAUTION:
Cap or wrap the joint of the hose with suitable material such as vinyl tape to avoid the entry of air.
Remove condenser. Refer to Exploded View.
INSTALLATION
Installation is in the reverse order of removal.
CAUTION:
-
Do not reuse O-rings.
-
Apply A/C oil to the O-rings of the condenser for installation.
-
After charging refrigerant, check for leaks. Refer to Leak Test.
 Exploded View
Exploded View
1.
Condenser
2.
...

Other materials:
Diagnosis Procedure
Diagnosis Procedure
Note:
The Signal Tech II Tool [– (NI-50190)] can be used
to perform the following functions: Refer to the Signal Tech II User
Guide for additional information.
Activate and display TPMS sensor IDs
Display tire pressure reported by the ...
U0079 Control Module Communication Bus G Off
Dtc Description
DTC Description
DTC DETECTION LOGIC
DTC No.
CONSULT screen terms
(Trouble diagnosis
content)
DTC detection condition
...
Diagnosis Procedure
Diagnosis Procedure
CHECK POWER WINDOW AUTO
OPERATION
Check AUTO operation when anti-pinch function
does not operate.
Refer to Diagnosis Procedure.
Is the inspection result normal?
YES>>
Ins ...
