Nissan Sentra Service Manual: Hoses
HOSE REMOVAL AND INSTALLATION
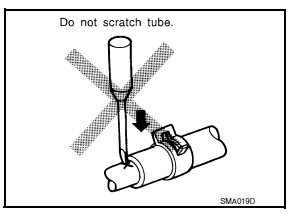 To prevent damage to
rubber hose, do not pry off rubber hose with
tapered tool or screwdriver.
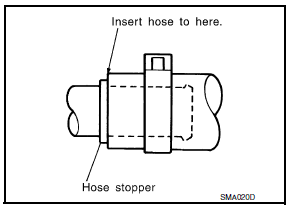 To reinstall the
rubber hose securely, make sure that hose insertion
length and orientation is correct. (If tube is equipped with hose stopper,
insert rubber hose into tube until it butts up against hose
stopper.)
HOSE CLAMPING
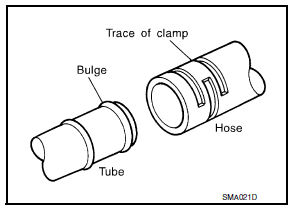 If old rubber hose
is re-used, install hose clamp in its original position
(at the indentation where the old clamp was). If there is a trace
of tube bulging left on the old rubber hose, align rubber hose at
that position.
Discard old clamps; replace with new ones.
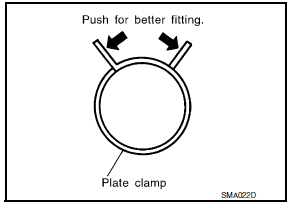 After installing
plate clamps, apply force to them in the direction of
the arrow, tightening rubber hose equally all around.
 Multiport Fuel Injection System or Engine Control System
Before connecting or disconnecting any harness connector for the
multiport fuel injection system or ECM:
Turn ignition switch to “OFF” position.
Disconnect negative battery ter ...
 Engine Oils
Prolonged and repeated contact with used engine oil may cause skin cancer.
Try to avoid direct skin contact
with used oil.
If skin contact is made, wash thoroughly with soap or hand cleaner as s ...
Other materials:
System
VDC/TCS/ABS
VDC/TCS/ABS : System Diagram
VDC/TCS/ABS : System Description
The system switches fluid pressure of each brake caliper and
each wheel cylinder to increase, to hold, or to
decrease according to signals from control unit in ABS actuator and electric
unit (control unit) ...
Precaution
Precaution for supplemental restraint system (srs)
"air bag" and "seat belt pre-tensioner"
The Supplemental Restraint System such as “AIR BAG” and “SEAT BELT
PRE-TENSIONER”, used along
with a front seat belt, helps to reduce the risk or severity of injur ...
Wiring diagram
Base audio
Wiring diagram
...
