Nissan Sentra Service Manual: P1217 Engine over temperature
DTC Logic
DTC DETECTION LOGIC
NOTE:
- If DTC P1217 is displayed with DTC UXXXX, first perform the trouble diagnosis for DTC UXXXX.
- If DTC P1217 is displayed with DTC P0607, first perform the trouble diagnosis for DTC P0607. Refer to EC-350, "DTC Logic".
If the cooling fan or another component in the cooling system malfunctions, engine coolant temperature will rise.
When the engine coolant temperature reaches an abnormally high temperature condition, a malfunction is indicated.
| DTC No. | CONSULT screen terms (Trouble diagnosis content) | DTC detecting condition | Possible cause |
| P1217 | ENG OVER TEMP (Engine over temperature) |
|
|
CAUTION:
When a malfunction is indicated, be sure to replace the coolant. Refer to CO-12, "Changing Engine Coolant". Also, replace the engine oil. Refer to LU-9, "Refilling".
- Fill radiator with coolant up to specified level with a filling speed of 2 liters per minute. Be sure to use coolant with the proper mixture ratio. Refer to MA-12, "Engine Coolant Mixture Ratio".
- After refilling coolant, run engine to ensure that no water-flow noise is emitted.
DTC CONFIRMATION PROCEDURE
1.PERFORM COMPONENT FUNCTION CHECK
Perform component function check. Refer to EC-369, "Component Function Check".
NOTE:
Use component function check to check the overall function of the cooling fan. During this check, a DTC might not be confirmed.
Is the inspection result normal? YES >> INSPECTION END
NO >> Proceed to EC-370, "Diagnosis Procedure".
Component Function Check
1.PERFORM COMPONENT FUNCTION CHECK-1
WARNING:
Never remove the radiator cap when the engine is hot. Serious burns could be caused by high pressure fluid escaping from the radiator.
Wrap a thick cloth around cap. Carefully remove the cap by turning it a quarter turn to allow built-up pressure to escape. Then turn the cap all the way off.
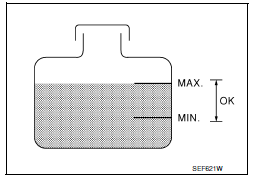
Check the coolant level in the reservoir tank and radiator.
Allow engine to cool before checking coolant level.
Is the coolant level in the reservoir tank and/or radiator below the proper range? YES >> Proceed to EC-370, "Diagnosis Procedure".
NO >> GO TO 2.
2.PERFORM COMPONENT FUNCTION CHECK-2
Confirm whether customer filled the coolant or not.
Did customer fill the coolant? YES >> Proceed to EC-370, "Diagnosis Procedure".
NO >> GO TO 3.
3.PERFORM COMPONENT FUNCTION CHECK-3
 With CONSULT
- Turn ignition switch ON.
- Perform “COOLING FAN” in “ACTIVE TEST” mode of “ENGINE” using CONSULT.
- Check that cooling fan speed varies according to the percentage.
 Without CONSULT
- Activate IPDM E/R auto active test and check cooling fan motors operation. Refer to PCS-9, "Diagnosis Description" (With Intelligent Key System) or PCS-37, "Diagnosis Description" (Without Intelligent Key System).
- Check that cooling fan operates.
Is the inspection result normal? YES >> INSPECTION END
NO >> Proceed to EC-370, "Diagnosis Procedure".
Diagnosis Procedure
1.CHECK COOLING FAN OPERATION
 With CONSULT
- Turn ignition switch ON.
- Perform “FAN DUTY CONTROL” in “ACTIVE TEST” mode of “ENGINE” using CONSULT.
- Check that cooling fan speed varies according to the percentage.
 Without CONSULT
- Activate IPDM E/R auto active test and check cooling fan motors operation. Refer to PCS-9, "Diagnosis Description" (With Intelligent Key System) or PCS-37, "Diagnosis Description" (Without Intelligent Key System).
- Check that cooling fan operates.
Is the inspection result normal? YES >> GO TO 2.
NO >> Proceed to EC-463, "Diagnosis Procedure".
2.CHECK COOLING SYSTEM FOR LEAK-1
Check cooling system for leak. Refer to CO-11, "System Inspection".
Is leakage detected? YES >> GO TO 3.
NO >> GO TO 4.
3.CHECK COOLING SYSTEM FOR LEAK-2
Check the following for leak.
- Hose (Refer to CO-11, "System Inspection".)
- Radiator (Refer to CO-16, "Inspection".)
- Water pump (Refer to CO-19, "Removal and Installation".)
>> Repair or replace malfunctioning part.
4.CHECK RADIATOR CAP
Check radiator cap. Refer to CO-11, "System Inspection".
Is the inspection result normal? YES >> GO TO 5.
NO >> Replace radiator cap. Refer to CO-15, "Exploded View".
5.CHECK THERMOSTAT
Check thermostat. Refer to CO-23, "Inspection".
Is the inspection result normal? YES >> GO TO 6.
NO >> Replace thermostat. Refer to CO-21, "Removal and Installation of Thermostat".
6.CHECK WATER CONTROL VALVE
Check water control valve. Refer to CO-25, "Removal and Installation".
Is the inspection result normal? YES >> GO TO 7.
NO >> Replace water control valve. Refer to CO-25, "Removal and Installation".
7.CHECK ENGINE COOLANT TEMPERATURE SENSOR
Refer to EC-199, "Component Inspection (ECT Sensor)".
Is the inspection result normal? YES >> GO TO 8.
NO >> Replace engine coolant temperature sensor. Refer to CO-24, "Exploded View".
8.OVERHEATING CAUSE ANALYSIS
If the cause cannot be isolated, check the CO-9, "Troubleshooting Chart".
>> INSPECTION END
 P1212 TCS Communication line
Description
This CAN communication line is used to control the smooth engine operation
during the TCS operation. Pulse
signals are exchanged between ECM and “ABS actuator and electric unit (c ...
 P1225 TP Sensor
DTC Logic
DTC DETECTION LOGIC
DTC No.
CONSULT screen terms
(Trouble diagnosis content)
DTC detecting condition
Possible cause
P1225
CTP LEARNING-B1
(Closed throttle ...
Other materials:
Sunshade
Exploded View
Sunshade
Moonroof unit assembly
Sunshade stopper (LH/RH)
Front
Removal and Installation
REMOVAL
Remove the headlining. Refer to INT-40, "Removal and Installation".
Remove the sunshade stoppers (1) (LH/RH) from the moonroof
unit assembly side rails (2) ...
Steering wheel turning force is heavy or light
Description
Steering wheel turning force is heavy or light.
Diagnosis Procedure
1.PERFORM SELF-DIAGNOSIS
With CONSULT
Turn the ignition switch OFF to ON.
Perform EPS self-diagnosis.
Is any DTC detected?
YES >> Check the DTC. Refer to STC-14, "DTC Index".
NO & ...
Glove box assembly
Removal and Installation
REMOVAL
Remove the instrument side finisher RH using a suitable tool.
Remove the glove box assembly upper screws (A).
Remove the glove box assembly lower screws (A).
Disconnect the harness connectors from the trunk switch and glove box
lamp, the ...
