Nissan Sentra Service Manual: Front seat
Driver side
DRIVER SIDE : Exploded View
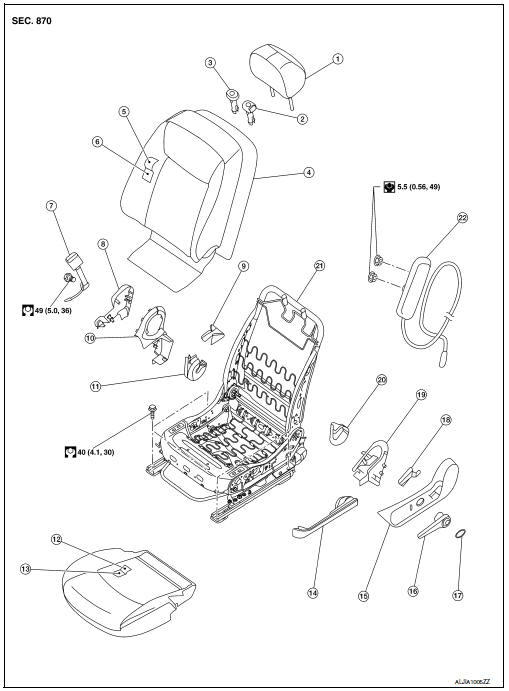
Driver side
- Headrest
- Headrest holder (locked)
- Headrest holder (free)
- Seatback silencer
- Seatback trim
- Seatback pad
- Seat belt buckle
- Seat cushion outer finisher (RH)
- Slide cover (RH)
- Seat cushion inner finisher (RH)
- Recline mechanism cover (RH)
- Seat cushion trim
- Seat cushion pad
- Slide cover (LH)
- Seat cushion outer finisher (LH)
- Lift lever
- Lift lever finisher
- Recline lever
- Seat cushion inner finisher (LH)
- Recline mechanism cover (LH)
- Seat frame assembly
- Side air bag module
DRIVER SIDE : Removal and Installation - Seat Assembly
REMOVAL
WARNING:
Do not leave any objects (screwdrivers, tools, etc.) on the seat during seat repair. It can lead to personal injury if the side air bag module should accidentally deploy.
CAUTION:
- When removing or installing the seat trim, handle it carefully to keep dirt out and to avoid damage.
- Do not drop, tilt, or bump the side air bag module while installing the seat. Always handle it with care.
- After front side air bag module inflates, the front seatback assembly must be replaced.
- When removing and installing the seat, use shop cloths to protect components from damage.
- Before removing the front seat, turn the ignition switch OFF, disconnect both battery cables and wait at least three minutes.
- Disconnect the negative and positive battery terminals and wait at least three minutes. Refer to PG-50, "Removal and Installation (Battery)".
- Slide the seat to the full forward position.
- Remove the two rear seat bolts.
- Slide the seat to the full rearward position.
- Remove the two front seat bolts.
- Tilt the seat rearward to disconnect the harness connectors from the seat and remove
INSTALLATION
Installation is in the reverse order of removal.
CAUTION:
Make sure that the seat harness or the floor trim is not damaged during installation.
NOTE:
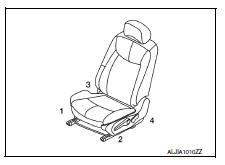
- When installing the LH front seat, tighten the bolts in the order shown
LH front seat bolt torque : 40 NВ·m (4.1 kg-m, 30 ft-lb)
Passenger side
PASSENGER SIDE : Exploded View
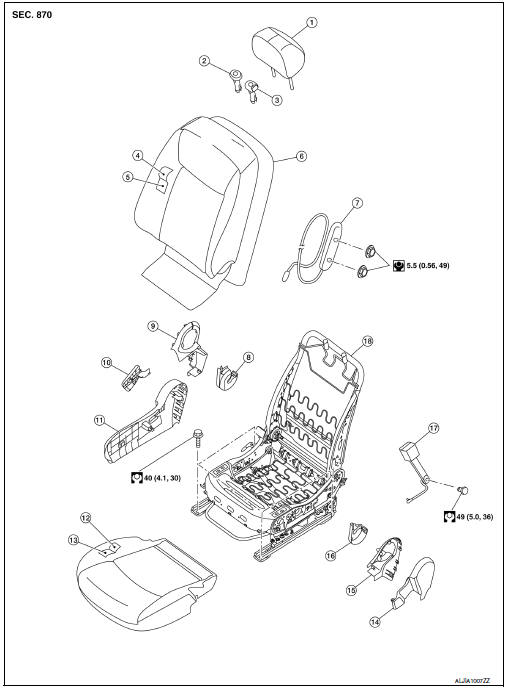
Passenger side
- Headrest
- Headrest holder (free)
- Headrest holder (locked)
- Seatback trim
- Seatback pad
- Seatback silencer
- Side air bag module
- Recline mechanism cover (RH)
- Seat cushion inner finisher (RH)
- Recline lever
- Seat cushion outer finisher (RH)
- Seat cushion trim
- Seat cushion pad
- Seat cushion outer finisher (LH)
- Seat cushion inner finisher (LH)
- Recline mechanism cover (LH)
- Seat belt buckle
- Seat frame assembly
PASSENGER SIDE : Removal and Installation - Seat Assembly
REMOVAL
WARNING:
Do not leave any objects (screwdrivers, tools, etc.) on the seat during seat repair. It can lead to personal injury if the side air bag module should accidentally deploy.
CAUTION:
- Front passenger seat is equipped with an Occupant Classification
System sensor and control module.
Do not disassemble front passenger seat cushion assembly or remove the trim as this will affect the Occupant Classification System calibration.
- When removing or installing the seat trim, handle it carefully to keep dirt out and to avoid damage.
- Do not drop, tilt, or bump the side air bag module while installing the seat. Always handle it with care.
- After front side air bag module inflates, the front seatback assembly must be replaced.
- When removing and installing the seat, use shop cloths to protect components from damage.
- Before removing the front seat, turn the ignition switch OFF, disconnect both battery terminals and wait at least three minutes.
- Disconnect the negative and positive battery terminals and wait at least three minutes. Refer to PG-50, "Removal and Installation (Battery)"
- Slide the seat to the full forward position.
- Remove the two rear seat bolts.
- Slide the seat to the full rearward position.
- Remove the two front seat bolts.
- Tilt the seat rearward to disconnect the harness connectors from the seat and remove.
INSTALLATION
Installation is in the reverse order of removal.
WARNING:
- Perform additional services when installing front passenger seat. Refer to SRC-41, "ZERO POINT RESET : Description".
- Zero point reset must be performed every time the front passenger seat is removed from the vehicle.
- Zero point reset is done after the front passenger seat is installed in vehicle and all bolts are tightened to specification.
CAUTION:
Make sure that the seat harness or the floor trim is not damaged during installation.
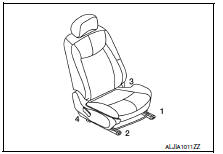
- When installing the RH front seat, tighten the bolts in the order shown.
RH front seat bolt torque : 40 NВ·m (4.1 kg-m, 30 ft-lb)
Heated seat switch
HEATED SEAT SWITCH : Removal and Installation
REMOVAL
- Remove the shift selector finisher. Refer to IP-17, "Removal and Installation".
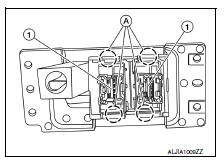
- Remove the screws (A) and the front heated seat switch finisher (1) from the center console assembly.
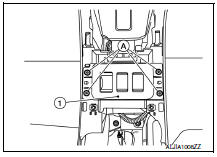
- Disconnect the harness connectors from the front heated seat switches.
- Release the pawls (A) using a suitable tool and remove the front heated seat switches (1) from the front heated seat switch finisher.
INSTALLATION
Installation is in the reverse order of removal.

 Rear seat
Exploded View
Rear seatback assembly (RH)
Seatback striker
Seatback latch release knob
Seatback latch assembly
Seatback silencer (RH)
Rear seatback frame (RH)
Seatback latch release ...
Other materials:
Recommended fluids and lubricants
Fluids and lubricants
*1: For additional information, see “engine oil recommendation”.
*2: As an alternative to this recommended oil, sae 5w-30 conventional
petroleum based oil may be used and meet all specifications
and requirements necessary to maintain the new vehicle limited ...
Seat belt extenders
If, because of body size or driving position, it is
not possible to properly fit the lap/shoulder belt
and fasten it, an extender that is compatible with
the installed seat belts is available that can be
purchased. The extender adds approximately 8 in
(200 mm) of length and may be used for eith ...
Periodic maintenance
CVT FLUID
Inspection
FLUID LEAKAGE
Check transaxle surrounding area (oil seal and plug etc.) for fluid
leakage.
If anything is found, repair or replace damaged parts and adjust
CVT fluid level. Refer to TM-251, "Adjustment".
Replacement
CVT fluid : Refer to TM-288, & ...
